Pool remodeling can go wrong in a lot of ways. Homeowners pick finishes before fixing structural issues. They set budgets that do not account for what gets discovered under the waterline tile. They hire a resurfacing crew when they actually need a full renovation. The best way to avoid those problems is to work through a real checklist before any decisions are made. This is the one we use with clients, and it is one of the most useful things we can share.
Step 1: Define the Goal Before Anything Else
The first question to answer is: what are you trying to solve? That sounds simple, but most homeowners come to us with a vague sense that the pool looks bad without a clear picture of why they are remodeling. The goal shapes everything else, including what gets inspected, what gets budgeted, and what order things happen in.
Are you remodeling to fix a functional problem like a rough surface that is scratching feet, or equipment that keeps failing? Are you updating for resale? Are you finally fixing a pool you inherited when you bought the house? Are you changing how the backyard functions to fit your family's current life? Different goals lead to different scopes of work, and knowing which one you have saves a lot of time and money.
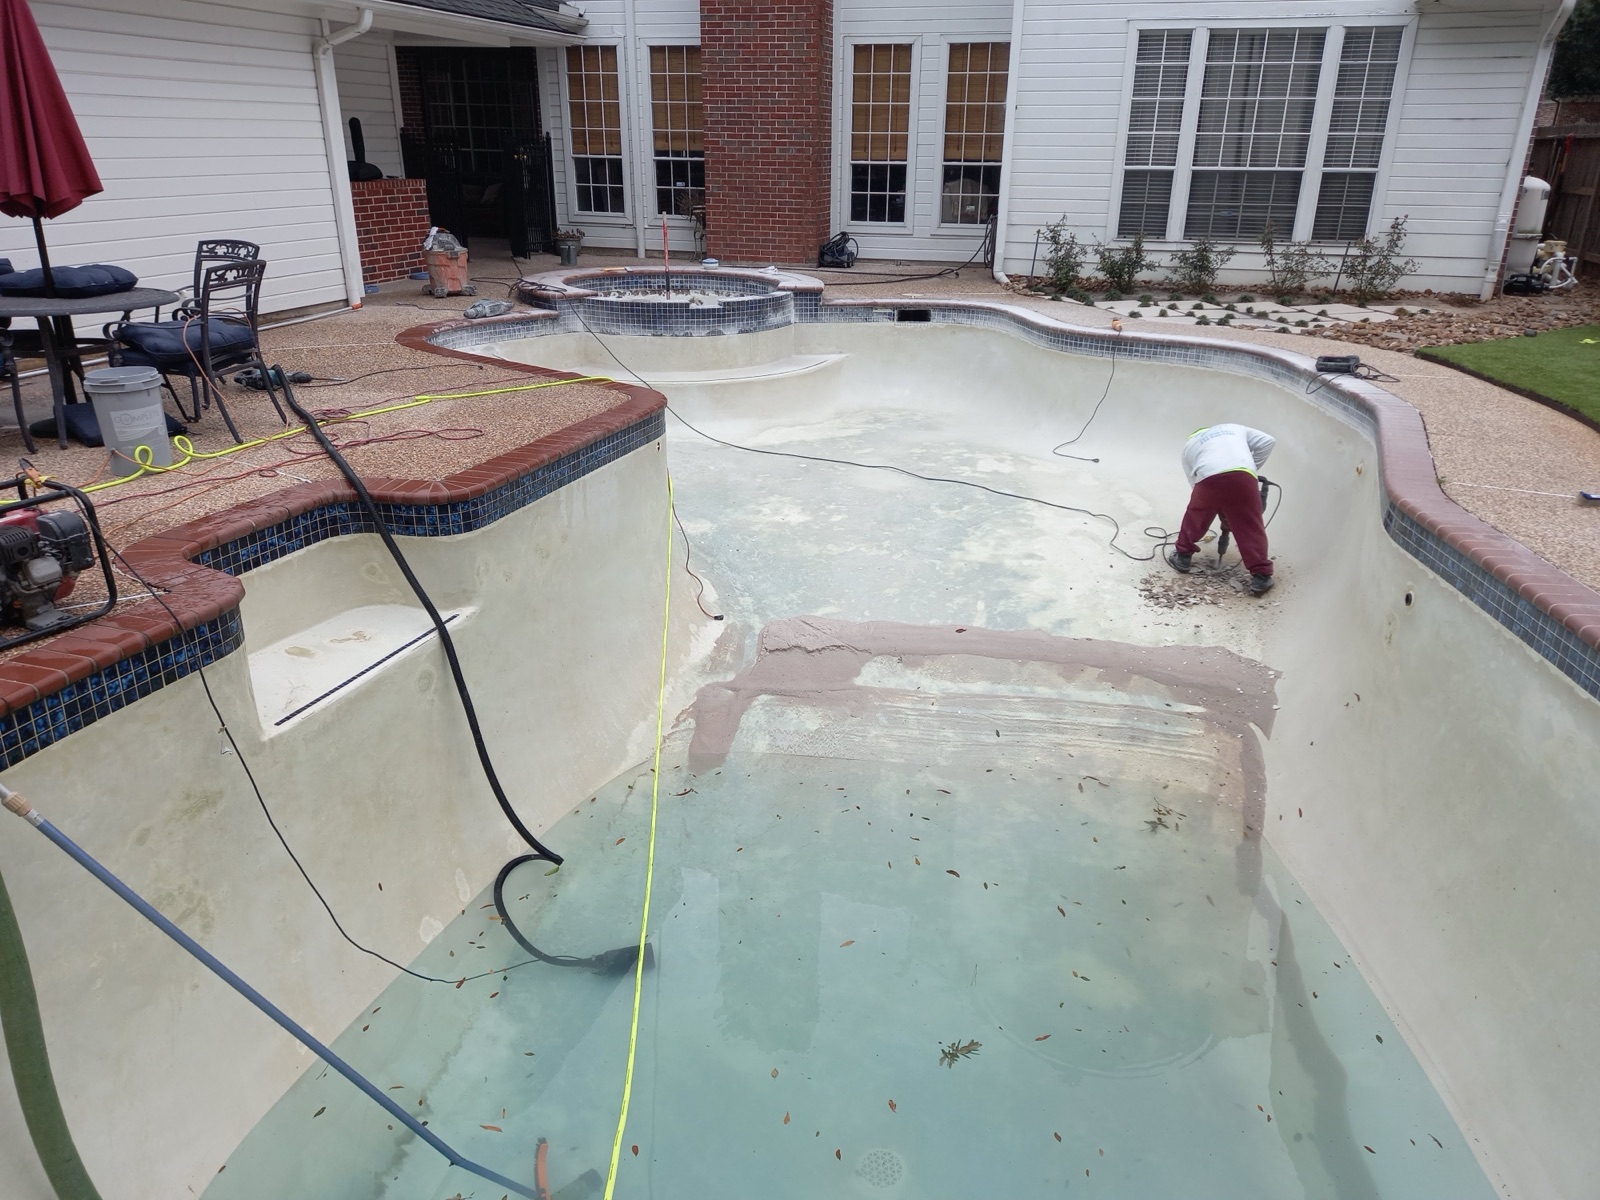
Step 2: Inspect First, Always
Before you look at a single finish sample or material catalog, inspect the pool properly. A thorough inspection covers the shell for structural cracks or shifting, plumbing lines for leaks, skimmer and return conditions, tile for adhesion failures, coping for separation from the bond beam, deck drainage and surface condition, and equipment age and performance.
This matters because pool systems are connected. You can spend money on a beautiful new pebble finish and then find out six months later that the circulation system is undersized and the chemistry balance is constantly off because of it. A good inspection tells you what actually needs fixing, which prevents you from spending money in the wrong order.
In Texas specifically, expansive soil is a factor. Our clay soils shift with moisture changes, and that movement puts stress on pool shells, plumbing connections, and coping over time. What looks like a surface problem sometimes has a soil movement component underneath it that needs to be addressed first.
Step 3: Set a Budget That Accounts for the Unknown
Pool remodeling budgets need to include a contingency. Once demolition starts, you may find conditions that were not visible during inspection. A deck that looks cracked on top may have subsurface issues that require more prep work. Plumbing that tested fine under the surface may show different results once the pool is drained and opened.
A practical approach is to separate your budget into must-haves and nice-to-haves. Must-haves are the structural repairs, the surface work, and anything safety-related. Nice-to-haves are upgraded lighting, automation, tanning ledge additions, or outdoor kitchen integration. Fund the must-haves fully, then allocate what is left for upgrades. This way, if something unexpected comes up during the project, you have room to handle it without cutting corners on the work that actually matters.
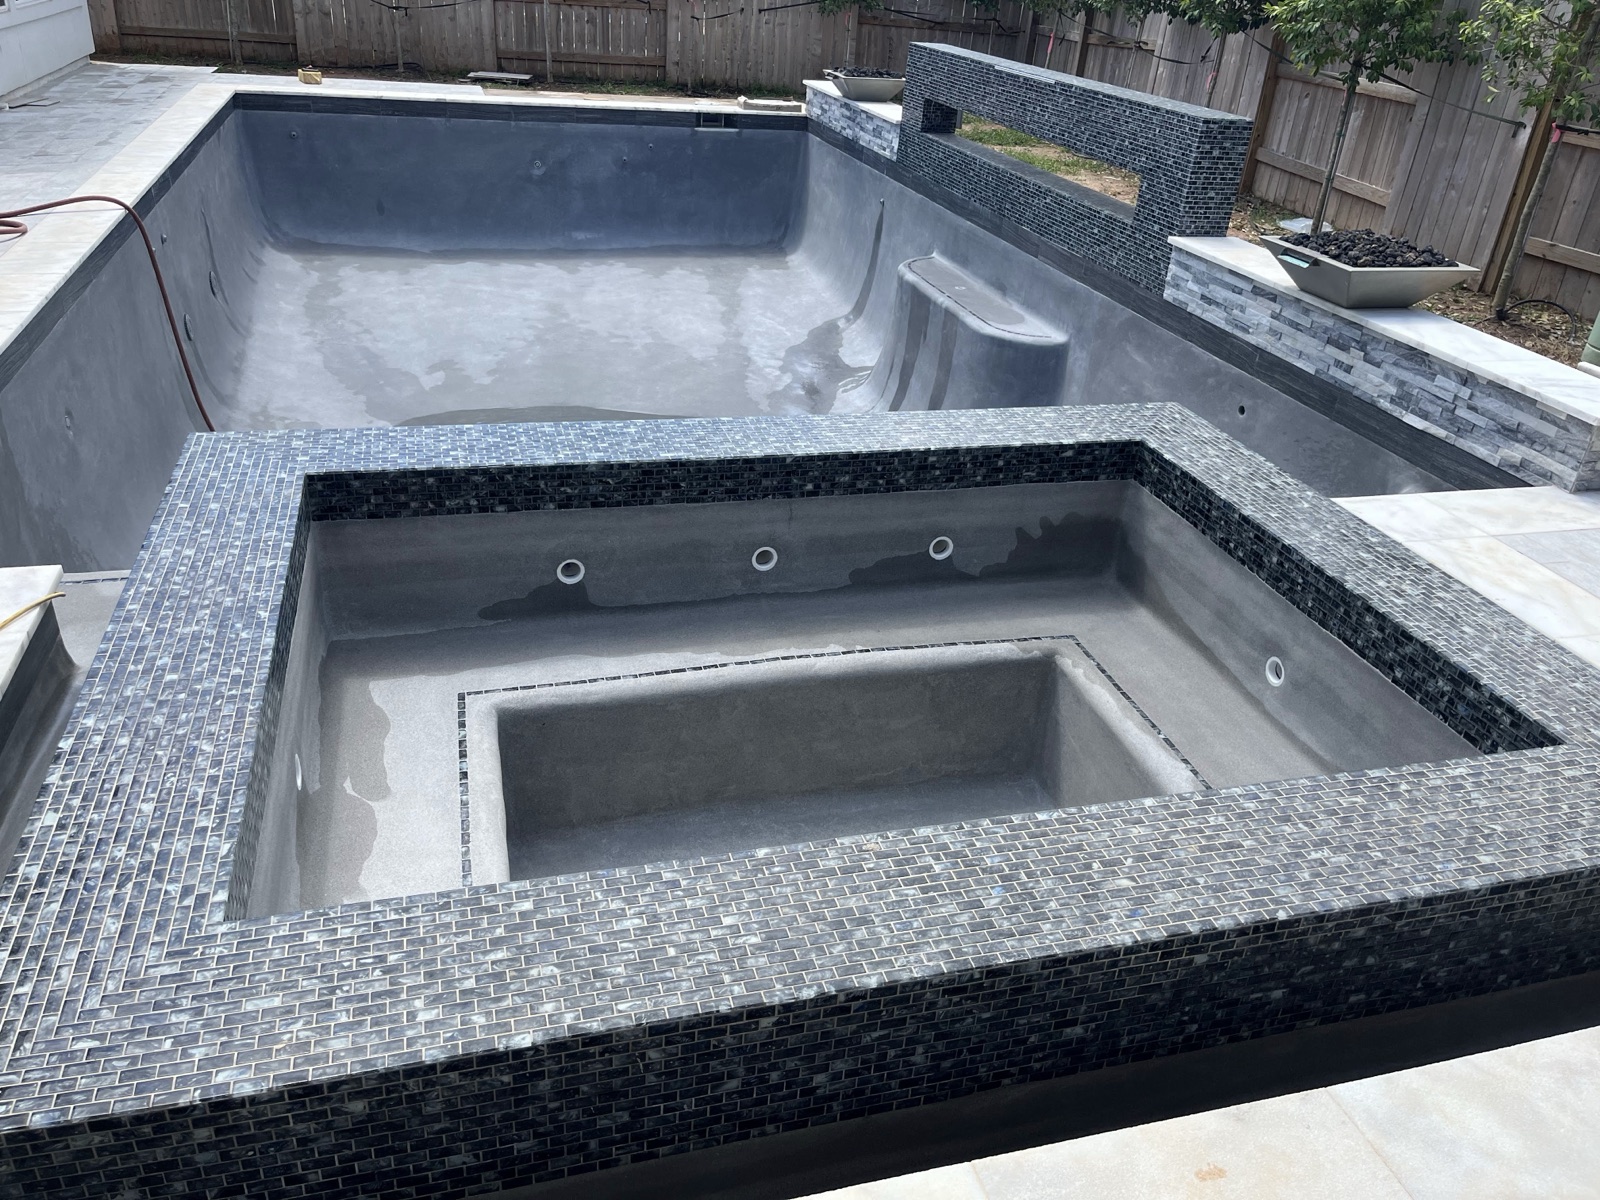
Step 4: Choose Finishes in the Right Order
Surface finishes come after structure, not before. Once you know the shell is sound and the plumbing is right, then it makes sense to look at interior finish options.
White plaster is the most affordable option and gives a clean, classic look, but it shows staining and requires attentive chemistry maintenance. Quartz finishes like Diamond Brite are more durable and stain-resistant, with a mid-range cost. Pebble finishes such as StoneScape and QuartzScape offer the most durability and the best long-term value, with natural textures that age well. In Texas heat, darker finishes absorb more heat and will warm the water faster, which some homeowners want and others do not.
Tile and coping should be selected at the same time as the interior finish so the colors and textures work together. Travertine coping with a natural pebble finish reads very differently than a porcelain tile with white plaster, and seeing those combinations together before committing prevents regret later.
Step 5: Upgrade Equipment While the Pool Is Open
When a pool is drained and in active remodeling, the cost of accessing and upgrading equipment drops significantly because the work is already in progress. This is the best time to address an aging pump, an inefficient filter, an outdated heater, or a missing automation system. Doing it separately later costs more because the mobilization and access work has to happen again.
Variable-speed pumps are one of the best upgrades available in terms of ongoing savings. They use significantly less electricity than single-speed pumps and can pay for themselves over a few years in energy costs. Automation systems that let you control chemistry dosing, lighting, and pump schedules from your phone add convenience and reduce chemical waste. If your equipment is more than eight to ten years old, the remodel is the right time to replace it.
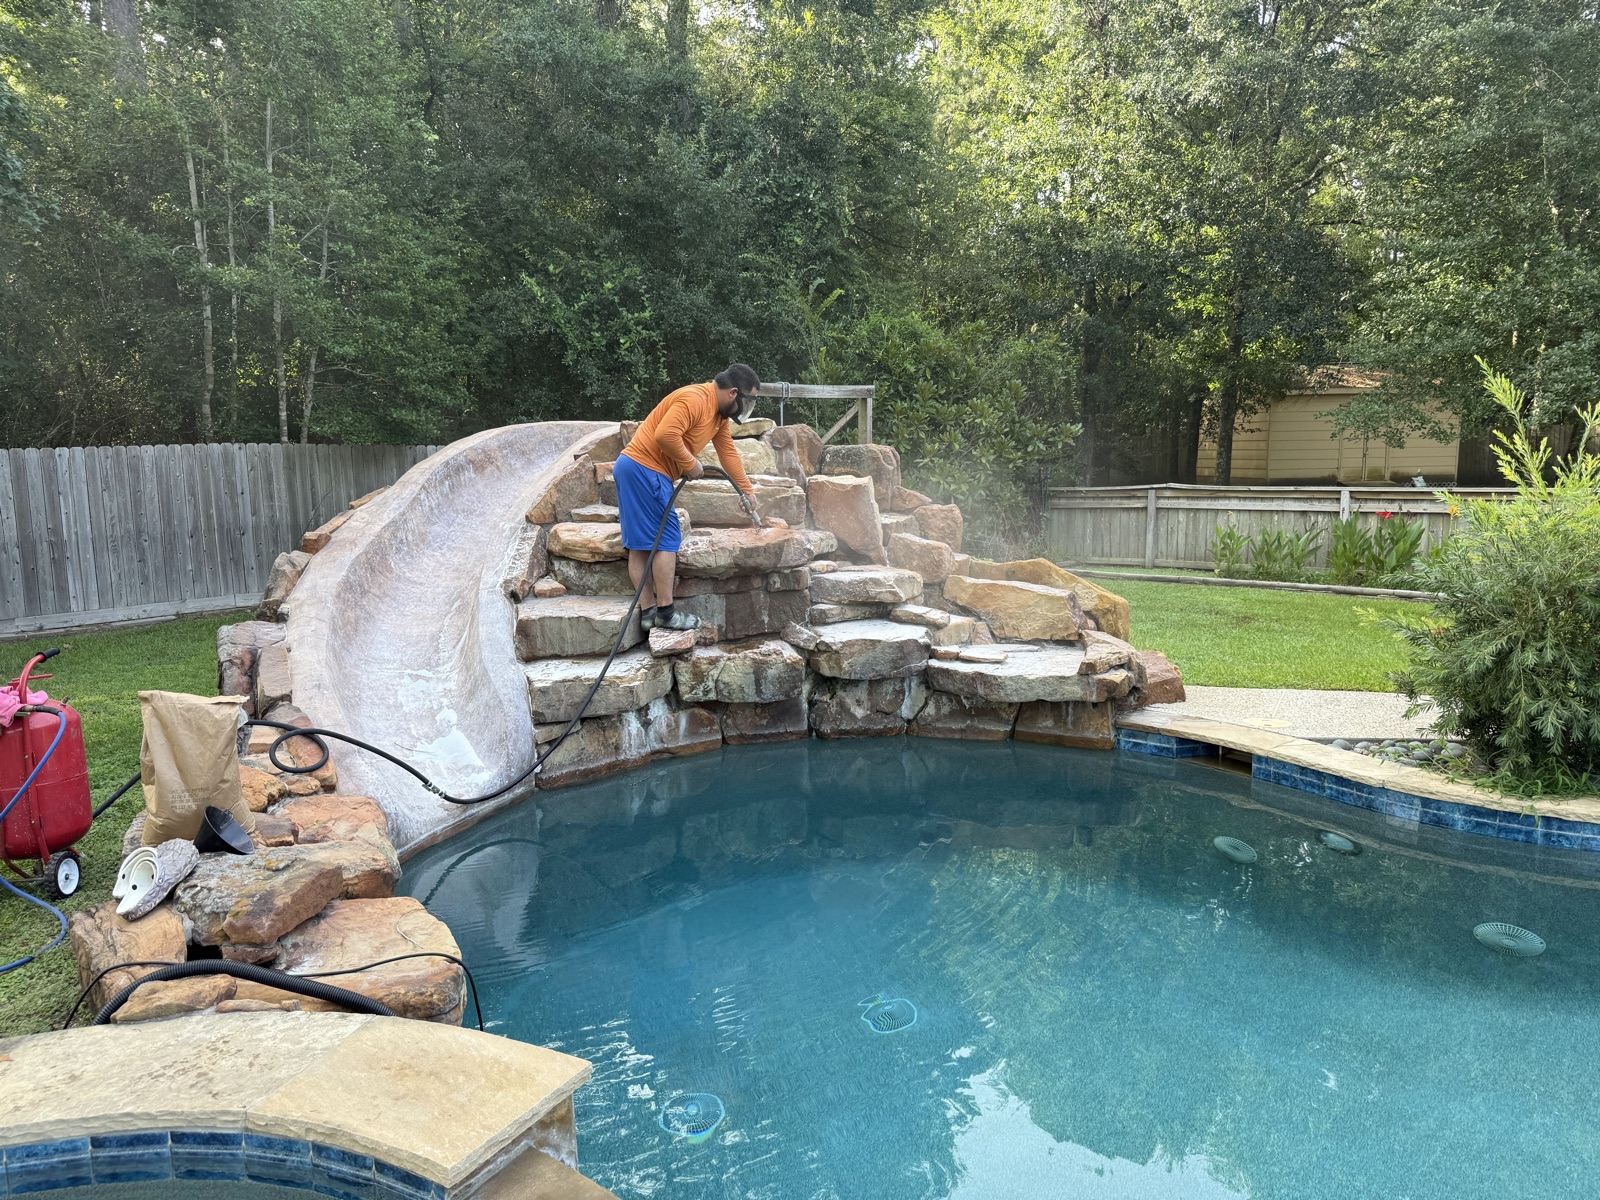
Step 6: Think Beyond the Pool
A remodel that stops at the water's edge misses an opportunity. The pool is part of a backyard system, and the most impactful renovations address the whole space. New coping and tile look better when the deck around them is in good shape. A beautiful interior finish is more enjoyable when there is covered shade to retreat to. A remodel is also the practical time to expand or upgrade the deck, add a covered patio, or improve drainage because the disruption is already happening.
Even modest additions to the outdoor living space can make a significant difference in how the backyard feels and functions. A good remodeling contractor should be able to help you think through what changes make sense given your goals and budget.
Step 7: Permits and Project Management
Pool remodeling work often requires permits, especially for structural changes, equipment upgrades, plumbing work, or additions to the pool. At CHR Builder, we handle the permit process on our end. What matters for you is knowing that the project should not start until the permits are in place, and that inspections need to happen at the right stages to keep the work compliant.
Good project management means you know who is on site each day, what work is planned, and how to reach someone if a question comes up. Scope changes should be documented in writing with updated pricing before work proceeds. Vague verbal agreements about changes are where most cost disputes come from.
Key Questions to Ask Any Builder Before Signing
- What exactly is included in the scope, and what is not?
- What happens if you find a structural problem during demolition?
- Are permits included, and who handles the inspections?
- What are the specific materials being used, by brand and product name?
- What is the warranty on the workmanship and on the materials?
- Who is managing the project day to day, and how do I reach them?
At CHR Builder, we hold a Certified Pool Operator (CPO) designation and are National Plasterers Council (NPC) certified. We put everything in writing and walk clients through the full scope before any work starts. That is the standard you should expect from any remodeling contractor.
Ready to Talk to an Expert?
If you have questions about planning a pool remodel and want to talk through what your project would actually involve, our owner is happy to walk through it on a free 15-minute call. No obligation, no sales pressure. Just a straight conversation with the person who will do the work.
Call us at (346) 481-3835 or book your free call at chrbuilder.com.